
You are currently browsing the category archive for the ‘gluten free’ category.
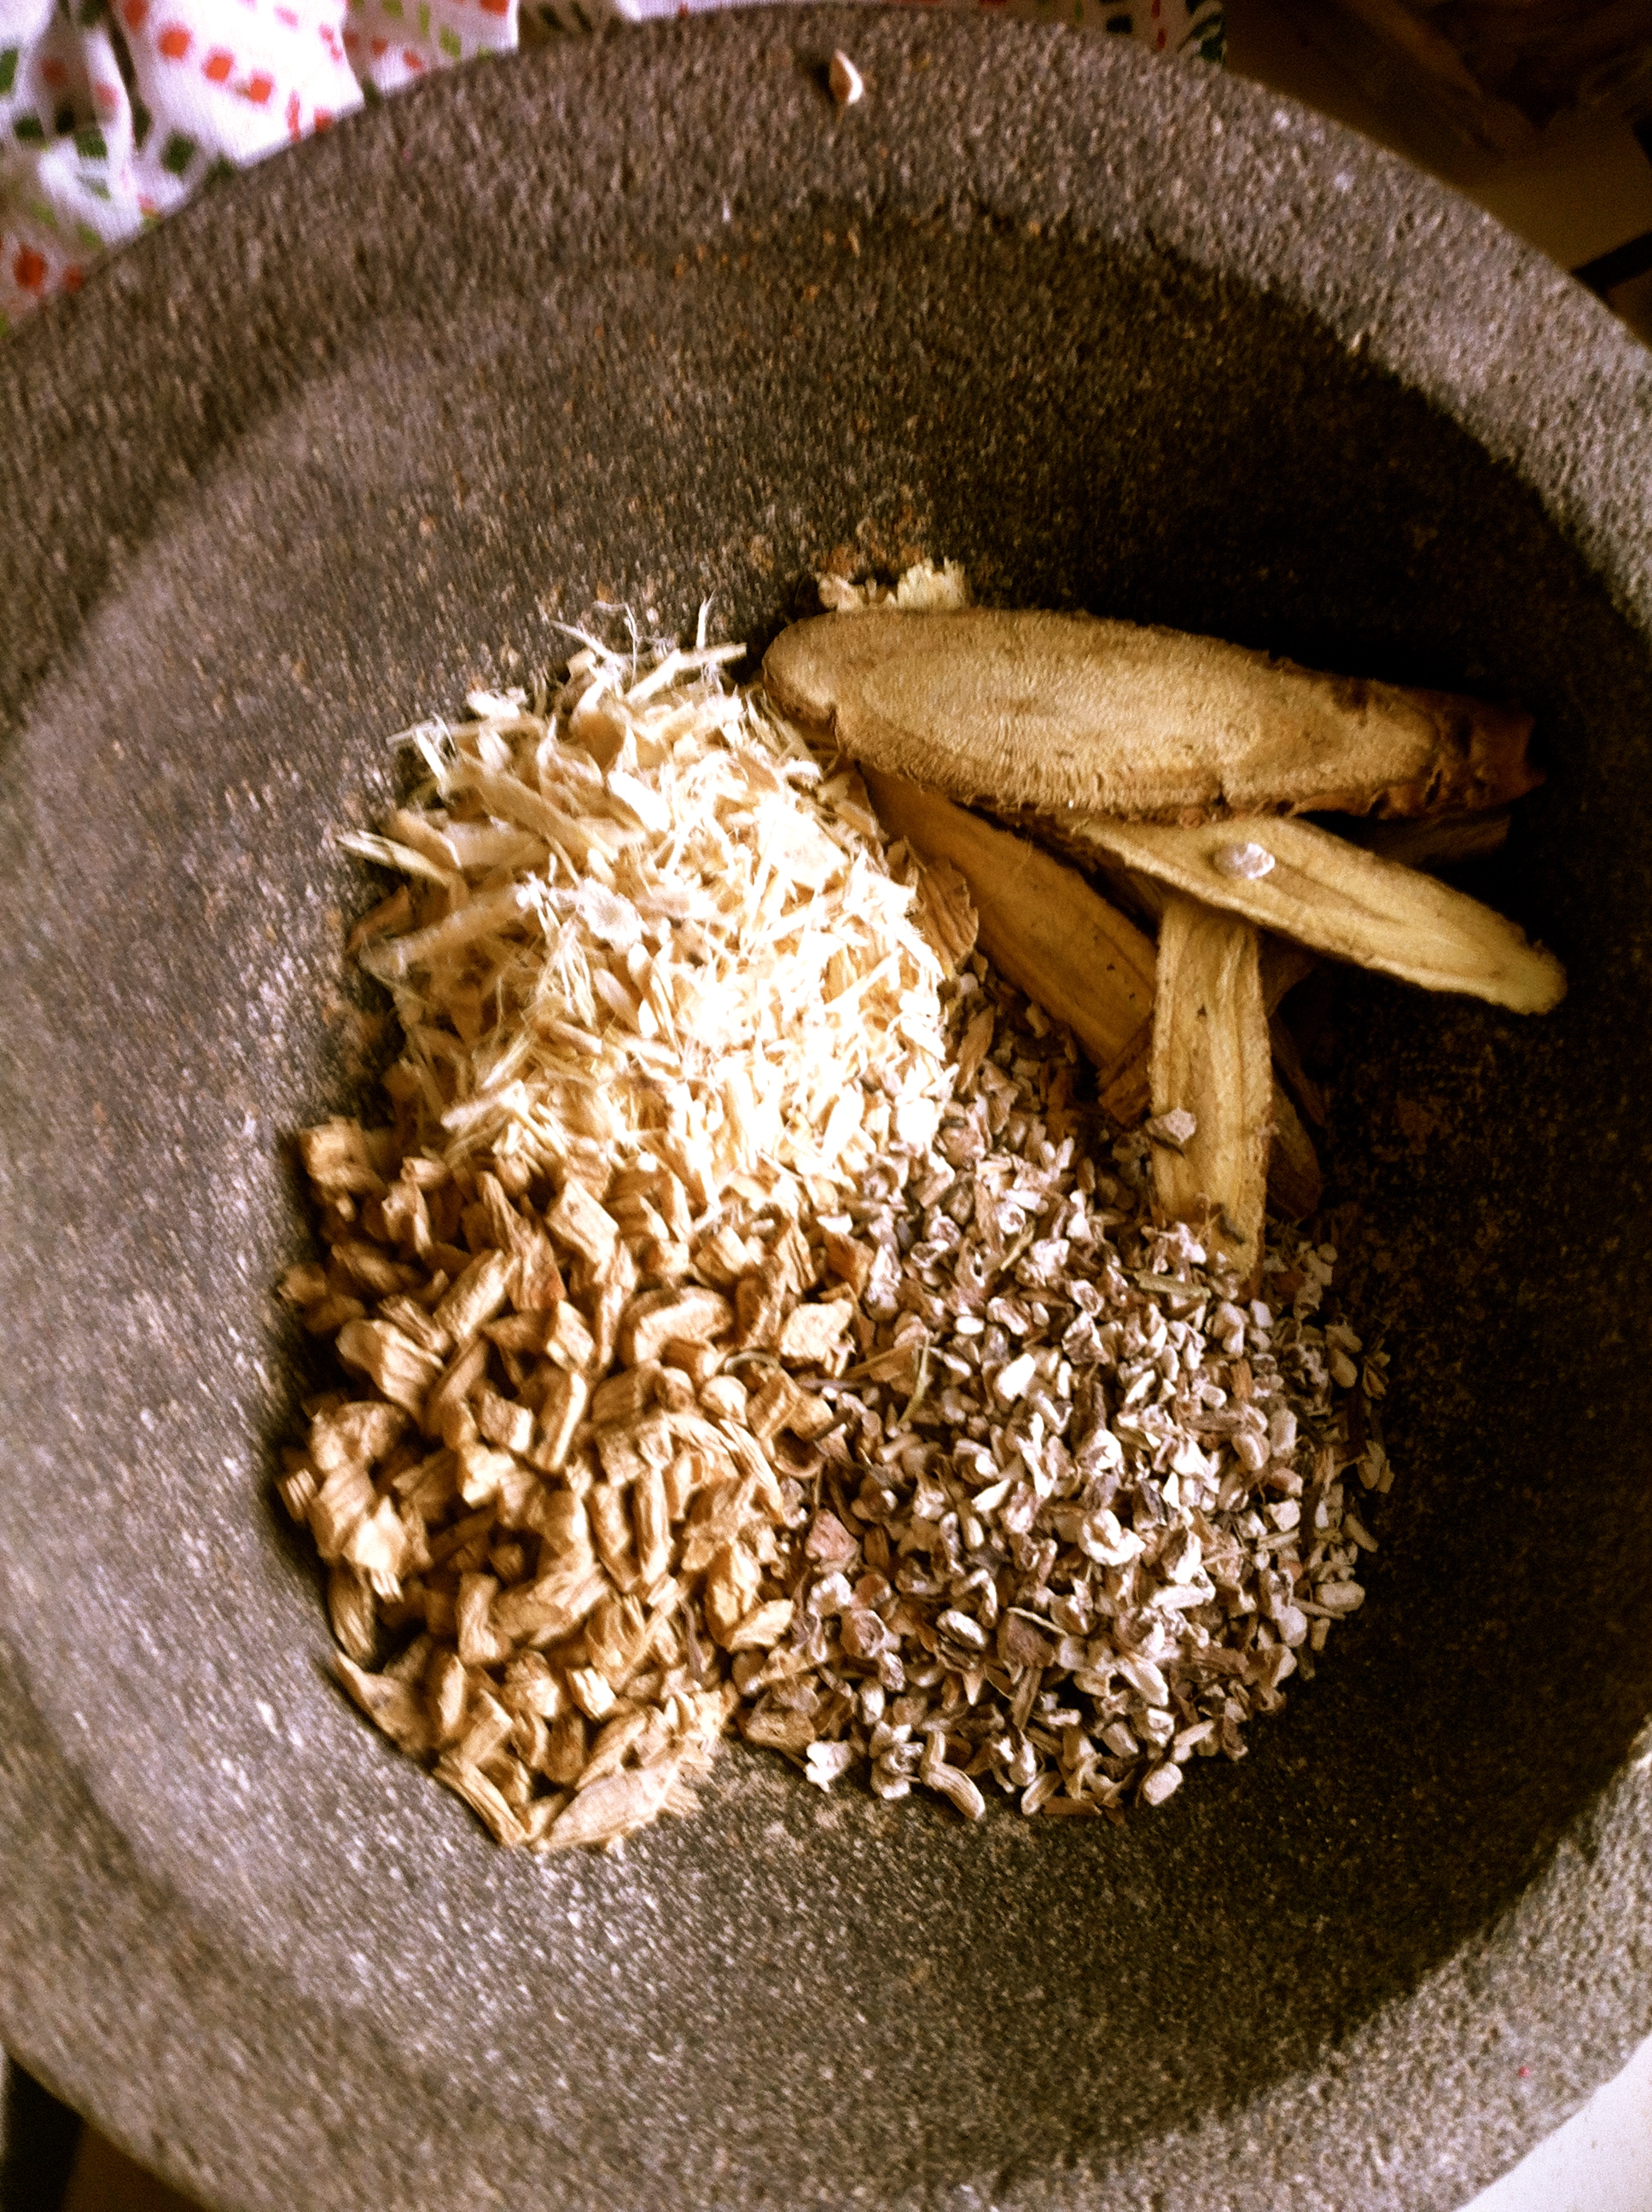
licorice, astragalus, burdock, dandelion root, codonopsis
Astragalus– immune stimulating (increases macrophages and natural killer cells) and adrenal tonic. great for anyone with spleen qi deficiency, supports good digestion. Very safe, mildly sweet flavor, overall tonifying.
Burdock root- Liver tonic, blood cleanser, alterative. Mildly bitter and therefore stimulating to the digestive system. Historically used for hormone balancing and skin conditions.
Dandelion Root- Alterative, liver tonic, nutritive. Wonderful for detoxification and elimination processes.
Licorice Root-Anti viral, immune modulating, adrenal tonic. Sweet flavor. Used to treat colds, coughs, stomach upset, chronic fatigue. (caution in high doses if you have high blood pressure)
Codonopsis – Also known as Dangshen, or poor man’s ginseng. Used to increase resistance to stress, increase energy, modulate immune response (increase response in cancer, decrease in autoimmune conditions).
Ginger– potent anti-inflammatory, antioxidant, anticancer, carminative (good for nausea, gas, dyspepsia). Warming.

cinnamon, cardamom, cloves, ginger, pepper
Cinnamon-wow, a powerhouse of health benefits! Anti-inflammatory (great for arthritis pain and menstrual cramps), antimicrobial, promotes healthy blood sugar and insulin sensitivity, can promote healthy cholesterol levels. Warming and delicious!
Black Peppercorns– Helps with digestion, is antioxidant and antimicrobial.
Cloves-Pain relief, high in antioxidants, antibacterial, digestive stimulant.
The amount of herbs pictured (I’m bad about measuring things, but you can see it’s a tablespoon or two of each herb) made one gallon of chai. Simmer the herbs for 45 minutes to an hour, add black tea and steep for 4 minutes. Strain. You can keep this mixture in the fridge for a week, heating up one cup at a time. Add cream and honey to taste. You might not need to add any honey as some of the herbs are quite sweet.
I recommend drinking super tonic chai daily to build strong adrenals, and keep your immune system healthy!

coconut macaroons
Easter and Eggs. Rebirth. Resurrection. Eternal life. Spring. Baby chicks. Bunnies. Asparagus. Hollandaise. Macaroons.
Last week I bought a giant bunch of gorgeous asparagus, and made several batches of hollandaise sauce to adorn it. So delicious and an easy way to get choline rich egg yolks, and CLA rich butter into our diet. Only using the egg yolks in hollandaise left me with a jar of egg whites. In the past that used to mean that an angel food cake was in my future, but now that I steer clear of gluten, I came up with a new plan.
6 Egg whites
2/3 cup honey
1/2 tsp sea salt
1 teaspoon vanilla
7 cups unsweetened wide flake coconut (if you want to read more about the many health benefits of coconut click here)
Into my vitamix (which serves me very well, but you could do this in a mixer or with a bowl and a whiskl) I put the egg whites. I blended on low power for a minute or so, then drizzled in the honey while it was on. I kept blending for another minute or so. The point is not to “beat the egg whites” into a meringue, but they did become smooth, silky and well blended. Add the salt and vanilla until incorporated. Pour the egg white mixture over your coconut (in a bowl) and mix by hand. Let this “batter” sit in the refrigerator for 30 min or more. It will stiffen up a bit and make it easier to shape into cookies. Try not to keep opening the refrigerator door to sample the mixture (like I did). I hear raw egg whites are not good for you. To shape the cookies you can scoop them with a small ice cream scoop, or use a tablespoon, or do it with your hands (I did), but the idea is to press the coconut together with some enthusiasm. The will tend to want to fall apart. I greased the baking sheet with coconut oil, but parchment paper or a silpat would have been much better. Bake in a low oven (I have a convection oven, so mine was at 250 degrees-if you have a regular oven try 300) until they are all toasty brown. After you take them out of the oven let them cool on the cookie sheet. If you try to move them right away they will fall apart. After they cooled I found they were difficult to get off the pan, even though I greased it. So I (pretty pleased with my brilliance) gently heated the bottom of the cookie sheet on a burner for just a few seconds and they came right off. I was quite delighted with how they came out. Chewy, sweet, perfect. Enjoy! I could imagine instead of balls, you could shape them into little nests to hide a chocolate egg or a dollop of lemon curd.

Root Love
I’ve been doing a little hibernating lately. It only seems appropriate during the shortest days of the year, and in soggy Portland. My menu these days reflects my desire for warming, grounding, nourishing foods.
Chicken and root vegetables in white wine
Into my dutch oven start some chicken thighs cooking in white wine, added golden beets, turnips, parsnips, celeriac, rutabaga, garlic cloves. Simmer in white wine with bay leaves, thyme, and rosemary, peppercorns, whole fennel seed, and a can of diced tomatoes, until the chicken falls off the bone, and the roots are tender.
Eat up and then go back to your good book by the fire!

roots and thighs
Grain Free Goji Berry Granola
I wanted to find a solution to what to eat with greek yogurt when I need a quick and easy snack/dessert. Having discovered that I am much healthier and happier when I avoid grains in my diet, I’ve been missing my homemade granola.

seeds and such
Into a bowl I started tossing seeds and such. Walnuts, pumpkin seeds, sunflower seeds, flax seeds, chopped almonds, fennel seeds, ground cinnamon. I melted a couple of tablespoons of butter and honey together, and tossed with the seeds until they were coated.
Next I spread it out on a sheet tray and baked in a slow oven (300) until toasty and almost done. Then I added some large flake coconut and put it back in the oven for a few minutes (watch it closely!) until toasty brown.

"granola"
After the mixture cooled, I added a few handfuls of dried goji berries (AKA wolfberries). While I don’t usually indulge in dried fruit because it delivers such a big shot of sugar, goji berries have actually been helpful in balancing blood sugar, they are high in antioxidants, and protect the brain and the eyes. If you are interested in reading more about goji berries click here.

Grain Free, Goji Granola
Store in an airtight container. Eat as a snack or sprinkled on greek yogurt with berries. Mmmmm.

Muffin beginnings
Still on my domestic roll here:
Grain Free Banana Raspberry Muffins
Makes 10 large muffins
6 eggs
1 banana, mashed up in the eggs
vanilla (I used a lot- like 2-3 tablespoons. yes, really!)
cinnamon
1 tablespoon butter, melted
2 tablespoons coconut butter, melted (not coconut oil, but the actually fleshy buttery coconut spread-really hard at room temperature, but delicious and spreadable if you heat it up)
1/2 cup honey, melted
Mix together the wet ingredients.

almonds and coconut flour
1 cup whole, raw almonds
1/2 cup coconut flour
Grind finely in food processor.
1/4 cup flax seeds
Add to wet ingredients.

dry and wet
Mix together and add frozen berries of your choice. I used raspberries, and I put in about 1 cup and a half. Fresh berries would work too, but it is January.
Spoon into buttered muffin pan, bake at 325 until done. I know, that’s skirting the issue. But it’s true! You want to check them after about 15 minutes and see how they are coming along. Then every 10 min or so after that. You can tell that they are done when they are browned on top, maybe cracking a little, come out of the muffin tin easily. By all means, break one open and test it!
These muffins are high in protein, good fats, and fiber. And fairly low in sugar. They keep well and are a handy snack to have around! I’m going back to my den now!

raspberry muffins

pumpkin pie
I love my pumpkin pie, but I am determined this year to not have regrets about what I ate over the holidays! How many times do I need to learn that the recovery time is not really worth the few bites of gluten laden decadence? For those of you looking for a delicious alternative to feeling regret, read on! I started with a real pumpkin because my CSA gives them to me! But working with canned pumpkin is just fine too. The only thing is you won’t have the yummy roasted pumpkin seeds to snack on while you are waiting for the pie to cool!
Start by baking a pumpkin, if that’s your plan.

pumpkin
Scoop out the guts and seeds of the pumpkin.

pumpkin guts
Bake face down on a sheet pan at 350 degrees until soft. Let cool before scooping the flesh out of the shell into a measuring cup.

baked pumpkin
Meanwhile, separate the pumpkin guts from the pumpkin seeds. Rinse the seeds and roast with a little oil (I used delicious, nutritious coconut oil which I got here) until you hear popping sounds coming from the oven. They should be crunchy and irresistible, especially with good salt. Pumpkin seeds are a powerhouse of nutrition. Known to be a good source of minerals including zinc and magnesium as well as protein and essential fatty acids. Research suggests they are useful for prostate health, bone density, parasites, arthritis and healthy blood lipids. Find out more here.

pumpkin seeds
In a food processor make the crust:
3/4 cup raw pecans or pumpkin seeds (grind ‘em up real good in the food processor)
1/4 cup ground flax seeds
1/2 cup coconut flour (find out why I’m such a fan of the coconut here and here)
1/2 tsp good salt
1/2 tsp cinnamon
1/3 cup coconut sugar
1/2 cup coconut oil
1 free range egg
Process dry stuff, add the coconut oil and process. Then add egg and pulse until it comes together. It will be sticky.
Press into a pie plate or tart pan. Freeze for 15-20 minutes, then bake for 20 minutes at 325 degrees until lightly browned.

crust
Next mix up the filling in the food processor:
Filling:
1 1/2 cups pumpkin puree
3 eggs
1/4 cup coconut sugar
1/2 cup maple syrup (or less)
1/2 tsp good salt
1/4 tsp allspice
1 tsp freshly grated ginger
pinch of cayenne
pinch of ground cloves
1 can coconut milk (not LITE)
Blend everything together until it is a smooth puree. Pour into partially baked pie crust. Tap to release bubbles.

unbaked custard
Bake 45-55 minutes at 325. Be sure to let it cool before you serve it.
Delicious ending to a healthy fall meal, but honestly it makes a darn good breakfast too!

dig in!
