You are currently browsing the tag archive for the ‘coconut’ tag.
Easter and Eggs. Rebirth. Resurrection. Eternal life. Spring. Baby chicks. Bunnies. Asparagus. Hollandaise. Macaroons.
Last week I bought a giant bunch of gorgeous asparagus, and made several batches of hollandaise sauce to adorn it. So delicious and an easy way to get choline rich egg yolks, and CLA rich butter into our diet. Only using the egg yolks in hollandaise left me with a jar of egg whites. In the past that used to mean that an angel food cake was in my future, but now that I steer clear of gluten, I came up with a new plan.
6 Egg whites
2/3 cup honey
1/2 tsp sea salt
1 teaspoon vanilla
7 cups unsweetened wide flake coconut (if you want to read more about the many health benefits of coconut click here)
Into my vitamix (which serves me very well, but you could do this in a mixer or with a bowl and a whiskl) I put the egg whites. I blended on low power for a minute or so, then drizzled in the honey while it was on. I kept blending for another minute or so. The point is not to “beat the egg whites” into a meringue, but they did become smooth, silky and well blended. Add the salt and vanilla until incorporated. Pour the egg white mixture over your coconut (in a bowl) and mix by hand. Let this “batter” sit in the refrigerator for 30 min or more. It will stiffen up a bit and make it easier to shape into cookies. Try not to keep opening the refrigerator door to sample the mixture (like I did). I hear raw egg whites are not good for you. To shape the cookies you can scoop them with a small ice cream scoop, or use a tablespoon, or do it with your hands (I did), but the idea is to press the coconut together with some enthusiasm. The will tend to want to fall apart. I greased the baking sheet with coconut oil, but parchment paper or a silpat would have been much better. Bake in a low oven (I have a convection oven, so mine was at 250 degrees-if you have a regular oven try 300) until they are all toasty brown. After you take them out of the oven let them cool on the cookie sheet. If you try to move them right away they will fall apart. After they cooled I found they were difficult to get off the pan, even though I greased it. So I (pretty pleased with my brilliance) gently heated the bottom of the cookie sheet on a burner for just a few seconds and they came right off. I was quite delighted with how they came out. Chewy, sweet, perfect. Enjoy! I could imagine instead of balls, you could shape them into little nests to hide a chocolate egg or a dollop of lemon curd.
I love my pumpkin pie, but I am determined this year to not have regrets about what I ate over the holidays! How many times do I need to learn that the recovery time is not really worth the few bites of gluten laden decadence? For those of you looking for a delicious alternative to feeling regret, read on! I started with a real pumpkin because my CSA gives them to me! But working with canned pumpkin is just fine too. The only thing is you won’t have the yummy roasted pumpkin seeds to snack on while you are waiting for the pie to cool!
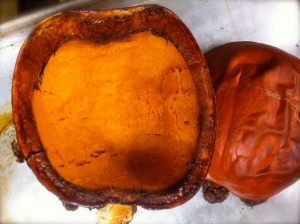
Start by baking a pumpkin, if that’s your plan.
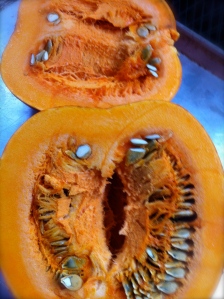
Scoop out the guts and seeds of the pumpkin.
Bake face down on a sheet pan at 350 degrees until soft. Let cool before scooping the flesh out of the shell into a measuring cup.
Meanwhile, separate the pumpkin guts from the pumpkin seeds. Rinse the seeds and roast with a little oil (I used delicious, nutritious coconut oil which I got here) until you hear popping sounds coming from the oven. They should be crunchy and irresistible, especially with good salt. Pumpkin seeds are a powerhouse of nutrition. Known to be a good source of minerals including zinc and magnesium as well as protein and essential fatty acids. Research suggests they are useful for prostate health, bone density, parasites, arthritis and healthy blood lipids. Find out more here.
In a food processor make the crust:
3/4 cup raw pecans or pumpkin seeds (grind ‘em up real good in the food processor)
1/4 cup ground flax seeds
1/2 cup coconut flour (find out why I’m such a fan of the coconut here and here)
1/2 tsp good salt
1/2 tsp cinnamon
1/3 cup coconut sugar
1/2 cup coconut oil
1 free range egg
Process dry stuff, add the coconut oil and process. Then add egg and pulse until it comes together. It will be sticky.
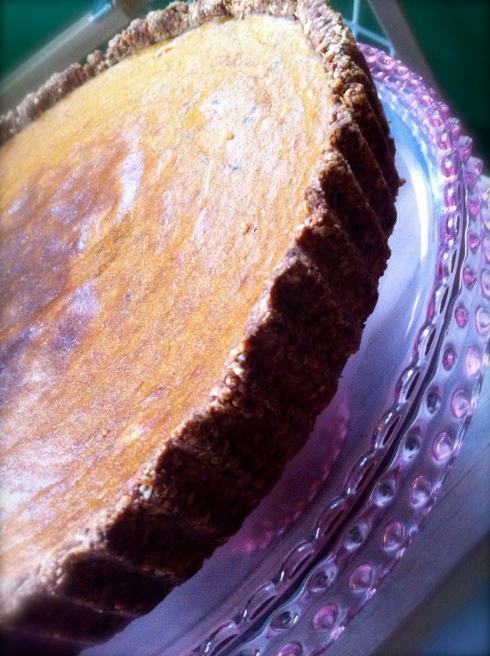
Press into a pie plate or tart pan. Freeze for 15-20 minutes, then bake for 20 minutes at 325 degrees until lightly browned.
Next mix up the filling in the food processor:
Filling:
1 1/2 cups pumpkin puree
3 eggs
1/4 cup coconut sugar
1/2 cup maple syrup (or less)
1/2 tsp good salt
1/4 tsp allspice
1 tsp freshly grated ginger
pinch of cayenne
pinch of ground cloves
1 can coconut milk (not LITE)
Blend everything together until it is a smooth puree. Pour into partially baked pie crust. Tap to release bubbles.
Bake 45-55 minutes at 325. Be sure to let it cool before you serve it.
Delicious ending to a healthy fall meal, but honestly it makes a darn good breakfast too!


